
Wednesday, October 27, 2010
Dome, duh Dome Dome!
some more work done on the dome this past week. More paint and weathering and mounted the Radar eye.

Friday, October 22, 2010
Dome
I received my dome yesterday and couldn't wait to tear into that bad boy.


Now, this dome isn't movie spec, but it can be made close with some additional work that I will document here. As I said, I couldn't wait to begin work, and got a little too ambitious for my own good. Using a technique I have employed many times on my costumes, I used a liquid masking agent (in this case, Mustard) and painted, wiped the masking agent off, applied more, painted again. Gives a very weathered, damaged look of chipping paint on something that has been painted over many times. Trouble is, it would see some of my paint had gone bad after a summer in the Texas heat. After the 4th coat, the paint began to crackle, split, and look like a mud pit after a drought.
It took me an hour to carefully strip all the paint off (and there was a lot of paint) with a paper towel and a small bottle of Naptha. I decided to stick a little closer to canon refferences and just do one layer on the R3 dome, with lots of scratches and paint chips. The pie panels are painted and I have started inital weathering.

Friday, October 15, 2010
Octagon Ports
Started my custom Octagon ports today. Some may call me blasphemous for not using the Canon style, but the actual shape and depth are the same. its just whats inside that will be different.


More on these later.


More on these later.
Wednesday, October 13, 2010
Whole lot 'a buildin' goin' on!
Ok, Its been about a month since i have updated this thing. My build has really taken off. Last Saturday, I along with some friends got all the body rings cut out of 1/8" styrene, using the Dave Everett plans.
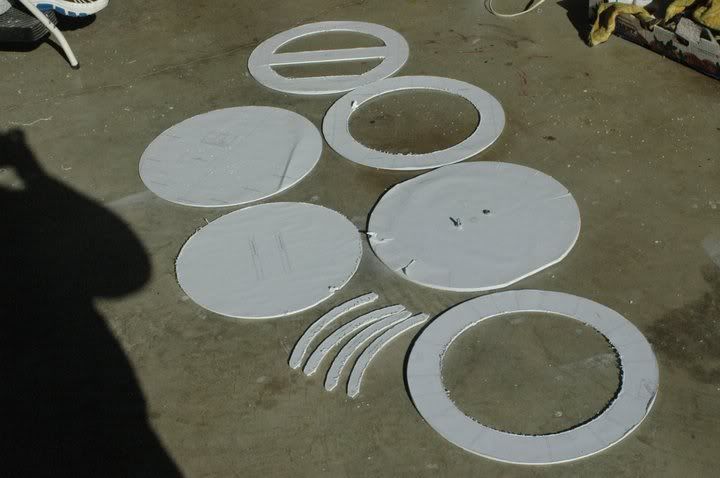
and then I began putting it all together over the course of this week.
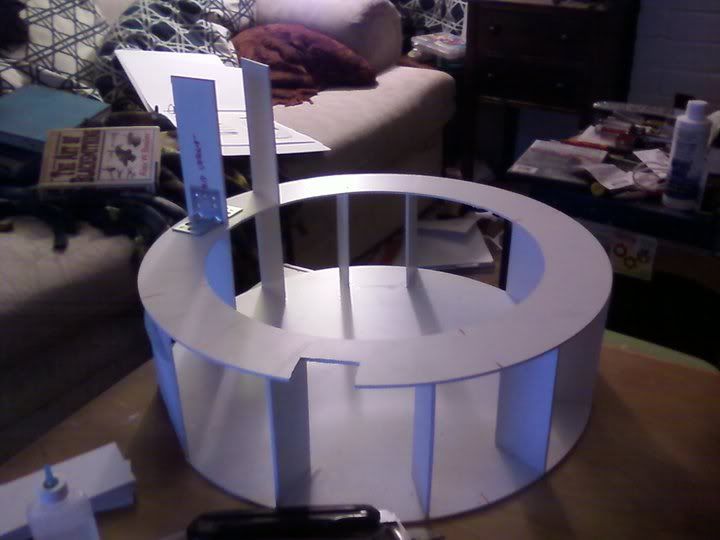
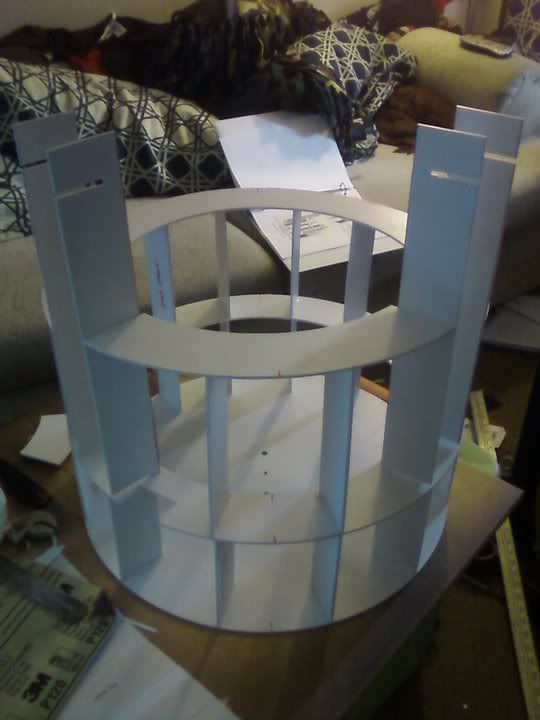
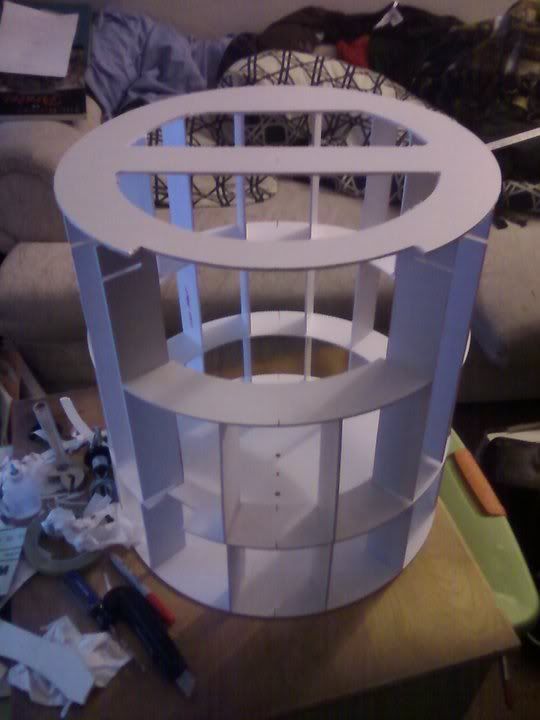
Here is the Reinforcement I made to the crossmember I cut into the top ring for the slip ring. It was a little flimsy for my taste, so I boxed it up.
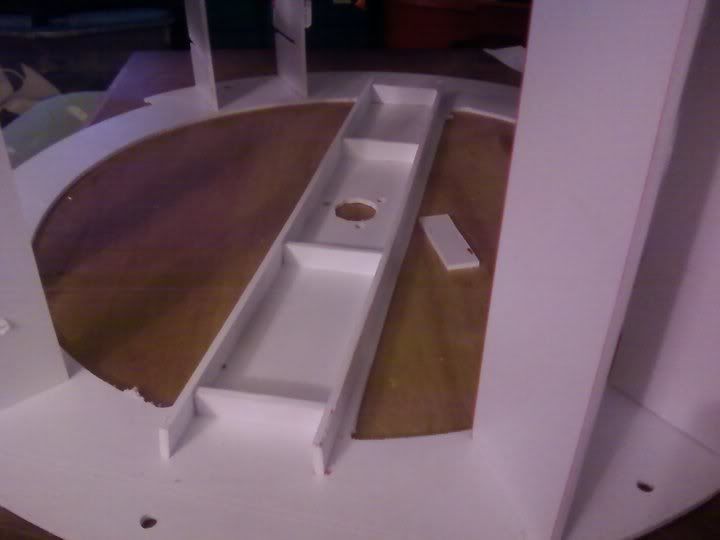 Thanks for looking, everybody. More to come as the build progresses.
and then I began putting it all together over the course of this week.
Here is the Reinforcement I made to the crossmember I cut into the top ring for the slip ring. It was a little flimsy for my taste, so I boxed it up.
Tuesday, September 14, 2010
Turn around....Bright eyes...
Started crafting my own Radar Eye today. I started with some Templates I found from Kelly Krider. I traced them on to some poster board and cut them out before taping and then glueing them together.


After the frame was glued together and set, I glued in the top from a cooking spray can that was the perfect size to act as the eye hole. The next step was to mix up the fiberglass resin and pour it in with some "Tiger Hair" (fiberglass weave cut up to make a cottony substance).

About and hour after I poured it, the resin was set up, so I took it out of the mold.

I then got out my trusty jitterbug sander and some 60 grit sandpaper and went to knockin the rough edges off. After about a half hour of sanding, this is what she looks like now.

The resin I used was really old and had some weak spots. Gonna take a lot more sanding and filling, but it will get there. This whole process cost me $3, due to the fact i had to buy posterboard.
**Edit** Got some good solid filling and sanding done. Shot a little primer .... Here she is..

Monday, September 13, 2010
Meetings of the Minds
Went out to Rowlett yesterday to hang out with Jerry Chevalier, Jeff Koenig and Glenn Pipe at Jerry's house. Got to see Jerry's awesome collection of bots and other Nerdery. The guys were super responsive and willing to answer all of my questions honestly, and with as much encouragement as possible.
I am now feeling much more confident and ready to tackle my build. Thanks guys, you have been a big help!
Now if only my parts would arrive......
I am now feeling much more confident and ready to tackle my build. Thanks guys, you have been a big help!
Now if only my parts would arrive......
Friday, September 10, 2010
The Files you seek are stored in the memory systems of this R2 unit!
Something I made a few weeks ago using an old Hallmark Ornament.


Holo Projectors of a different sort.
So a year or so ago, I aquired a few parts that I had no specific purpose for, I just wanted to add them to my Greeble collection for later use. 3 of them were LearJet Reading Lamp housings.
These will become my new Holo Projectors for Exbee. They are similar to the Beachcraft ones used on R2D2, but shorter, smooth, and more cylindrical, rather than conical. I think they will add a nice touch, and help to not make Exbee look just like an R2 repaint. I plan to weather it up a bit, add some scratches and patina, and add some LED's.
Thursday, September 9, 2010
The Journey Begins!
Well, as some of you know, I have begun the long, and arduous task of building an Astromech Droid. The Droid I will be building is one of my own Custom Creations, centered around the R2 Series Astromech. Like so:


Exbee will have a clear dome, which I ordered today, for $36.28(shipping included). It is an older style Aspects Super-dome squirrel guard that goes over a bird feeder:

Subscribe to:
Posts (Atom)